


Update Vendor Contact Information
Learn how to add additional contacts to your vendor profile or revise existing vendor contact information in PASSPort.
Before we begin
The steps below can be completed by users provisioned with the roles:
- Vendor Admin
-
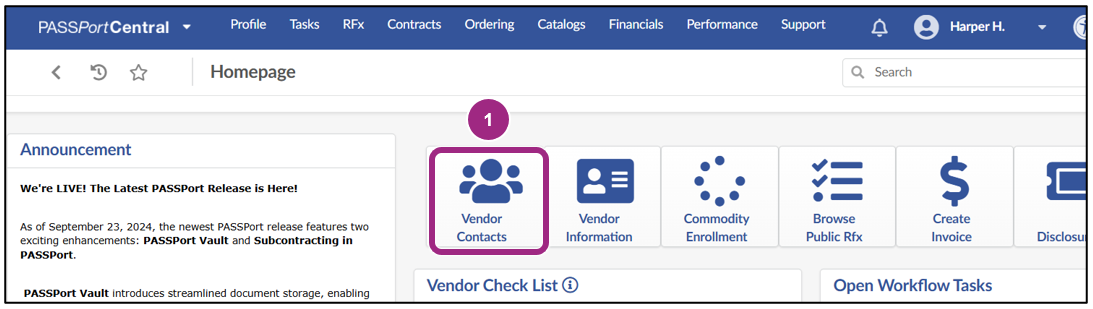
On the PASSPort Homepage, click the Vendor Contacts icon from the Quick Links window.
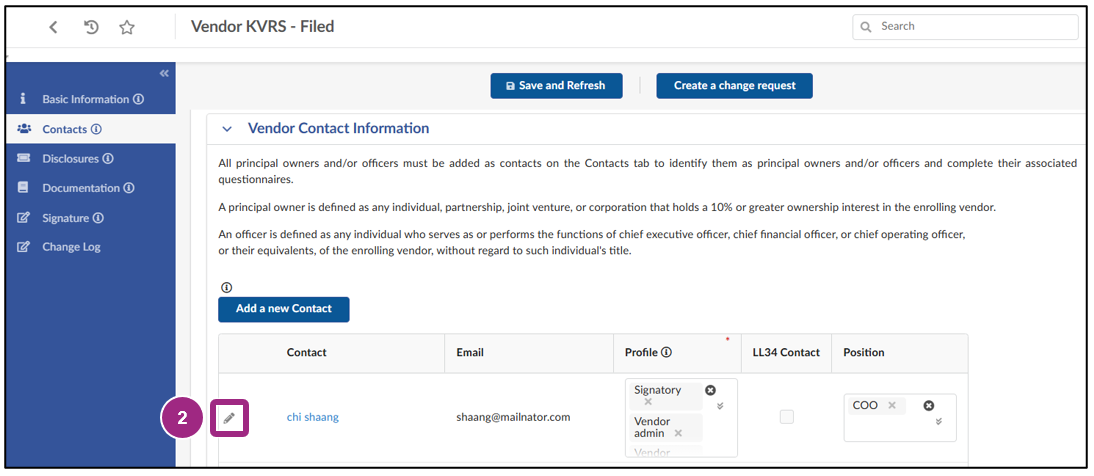
The Contacts tab of your Vendor Profile is displayed.
Contacts are displayed in a table within the Vendor Contact Information section.
-
To edit an existing contact, click the pencil icon to the left of the contact's name.
-
In the Contact Management window, make any necessary changes.
Then, click the Save and Close button.
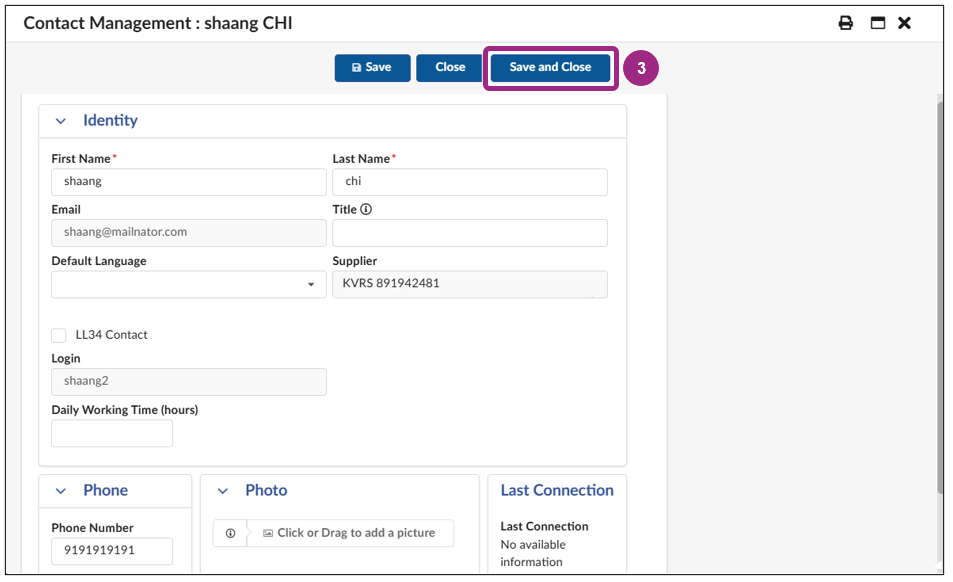
Important: If a contact has already logged into PASSPort using their own NYC.ID, that contact's email address cannot be changed. Instead, the Vendor Admin should add a new contact with the new email address and then delete the old contact. This will require the user to create a new NYC.ID with the new email address in order to login to PASSPort.
-
To add a new contact, see the Add Users and Assign Roles guide.
Note: Each contact must be assigned a user role to log in and perform actions in PASSPort Review the Task Authorizations by User Role section of the Add Users and Assign Roles guide for detailed information on the tasks each user role is able to perform in PASSPort.
Last updated: April 24, 2025