


Submit the Discretionary Prequalification (PQL) Application
Learn how to complete and submit the Discretionary PQL Application to meet City Council Discretionary Award clearance requirements.
Before We Begin
The steps below can be completed by users provisioned with the roles:
- Vendor Admin
- Vendor Procurement L1
- Vendor Procurement L2
Overview
To clear City Council Discretionary awards for agency processing, the Discretionary Prequalification (PQL) Application collects basic information to verify each nonprofit organization's ability to establish or maintain a business relationship with the City. For more information about the City Council Discretionary Award Process, visit this MOCS information page: Discretionary Award Process.
Only nonprofit organizations with an approved Discretionary Prequalification Application meet the procedural requirement for City Council Discretionary Award clearance.
Note: If an organization also wants to be eligible to compete for health/client service contracts in PASSPort, complete the HHS Accelerator Prequalification Application instead.
The Mayor's Office of Contract Services (MOCS) reviews and approves all Discretionary PQL Applications. Once approved, most nonprofits are prequalified until their organization's annual financial statement or report expires. Nonprofits that are exempt from filing annually with the NYS Charities Bureau will be Approved for 3 years.
Important: Nonprofits that are required to file annually with the NYS Charities Bureau must update their Discretionary Prequalification Application in PASSPort each year to maintain prequalified status!
Find the Discretionary Prequalification List
-
From the PASSPort Homepage, or anywhere in PASSPort Central, click (or hover over) RFx in the top navigation and select Browse Prequalified Lists from the drop-down menu.
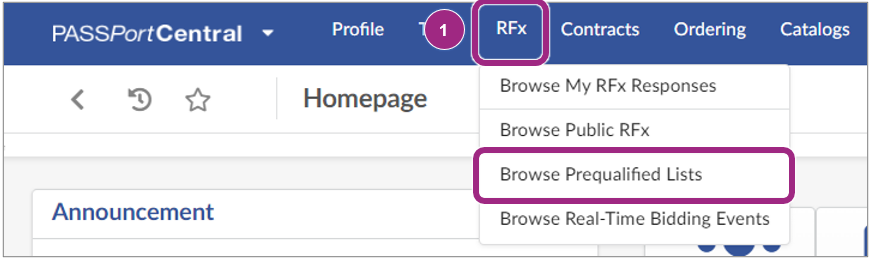
The Browse Prequalified Lists page displays with all open and closed prequalified lists.
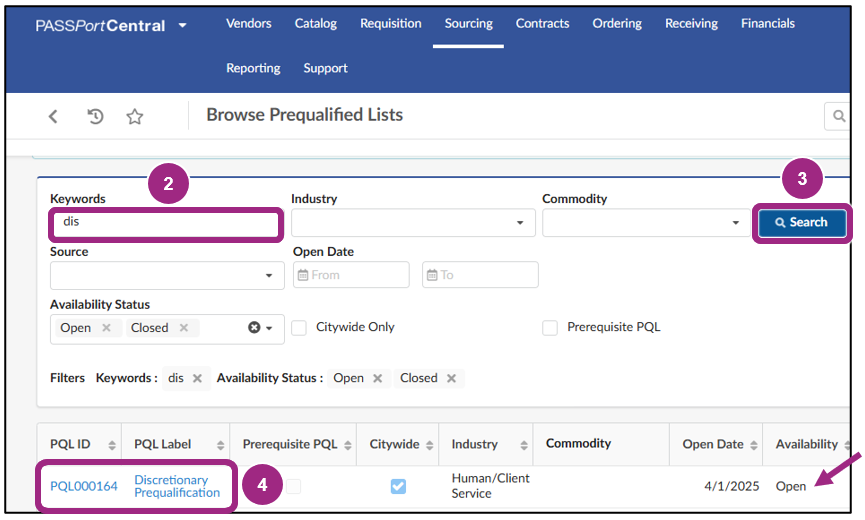
- To search for the Discretionary Prequalification list, type “164” or “dis” (the beginning of the word discretionary) in the Keywords field.
- Click the Search button and the list will display in the table below the search parameters.
-
Click the PQL ID or PQL Label to view the Discretionary PQL application.
-
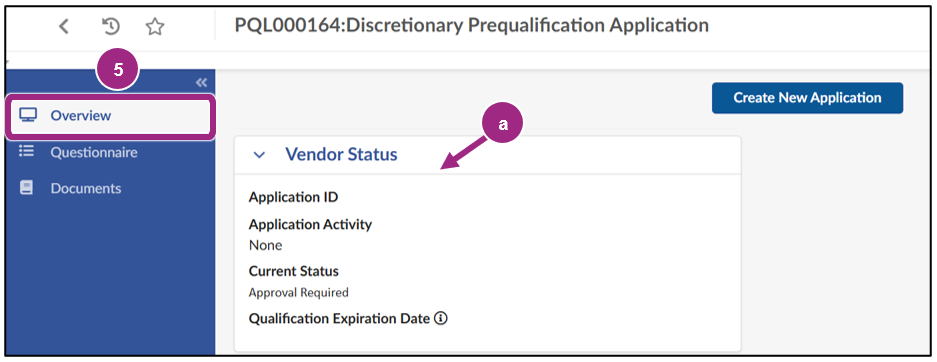
The Discretionary Accelerator PQL Application appears showing the Overview tab. The Current Status column refers to your organization's status in relation to the PQL.
The Overview tab contains information related to the prequalified list and where your organization stands in relation to the list.
-
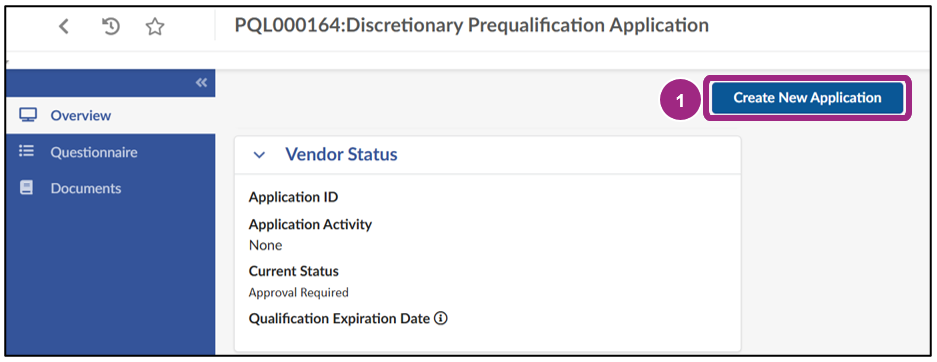
The Vendor Status section contains information specific to your organization related to the PQL such as the Application ID (a unique identifier related to your organization's PQL application), Application Activity status, your Current Status and the Qualification Expiration Date. Prior to starting any Discretionary Prequalification action, your organization's Application Activity will show None and the Current Status will be Approval Required.
Note: The Qualification Expiration Date is driven by the Validity End Date of Required Documents submitted in the Documents tab. The document's Validity End Date signifies the expiration of prequalification.
-
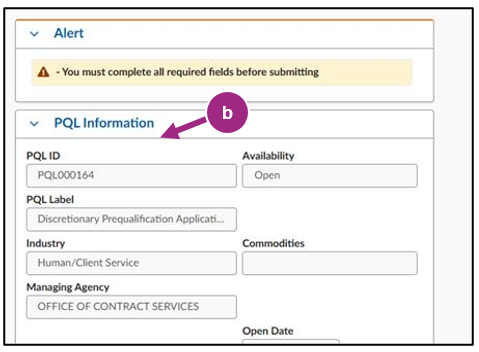
The PQL Information section provides key information about the PQL, including the PQL ID, PQL Label, the Managing Agency, Industry and more.
-
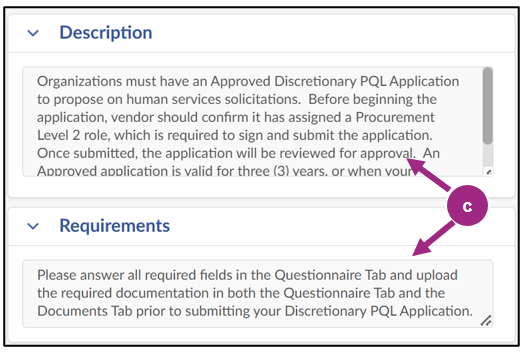
The Description and Requirements sections provide a brief description of the PQL and any instructions or requirements that apply to the PQL.
-
Start a New Discretionary PQL Application
-
In the Overview tab, click the Create New Application button located at the top of the page.
-
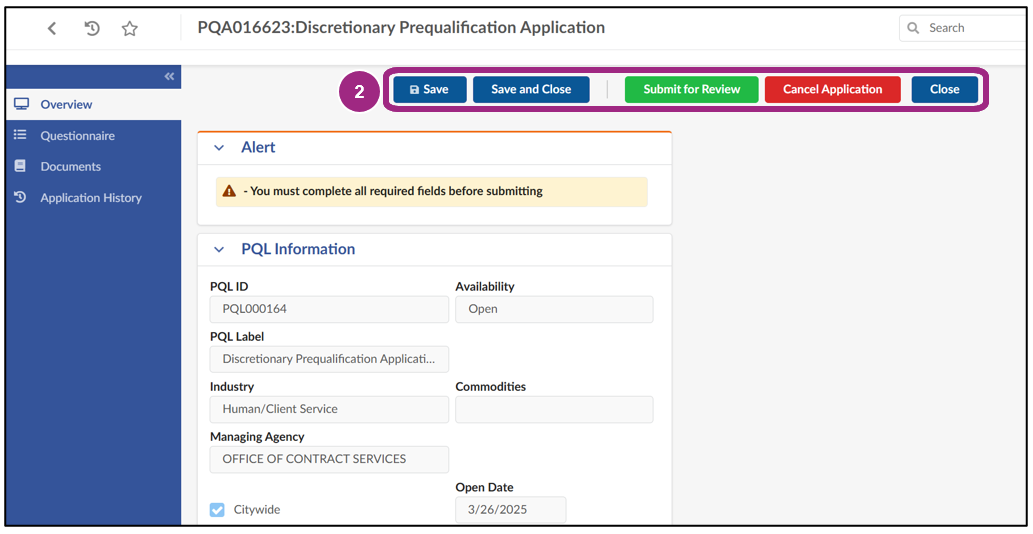
The page refreshes creating the Draft application and changes to some sections of the Overview tab and to the PQL:
- New buttons appear at the top of the PQL: Save, Save and Close, Submit for Review, Cancel Application and Close.
- In the Overview tab, a new Alert section will appear before the PQL Information section.
- In the Vendor Status section, the Application ID will show the unique identifier of the application that was created, and Application Activity will update to Draft status.
Complete the Questionnaire
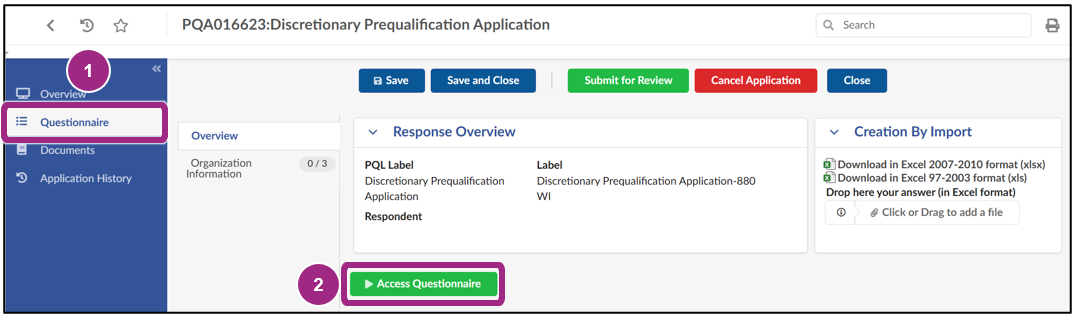
- In the Discretionary PQL, go to the Questionnaire tab.
-
In the Questionnaire tab's Overview, click the green Access Questionnaire button to view the initial prompt in the Questionnaire's Business Information section.
Business Information
Applicants will be required to upload the current versions of key business documents and certify they will submit a specific Financial Statement or Report in the Documents tab.
Required business documents for nonprofit organizations in the Discretionary PQL Questionnaire:
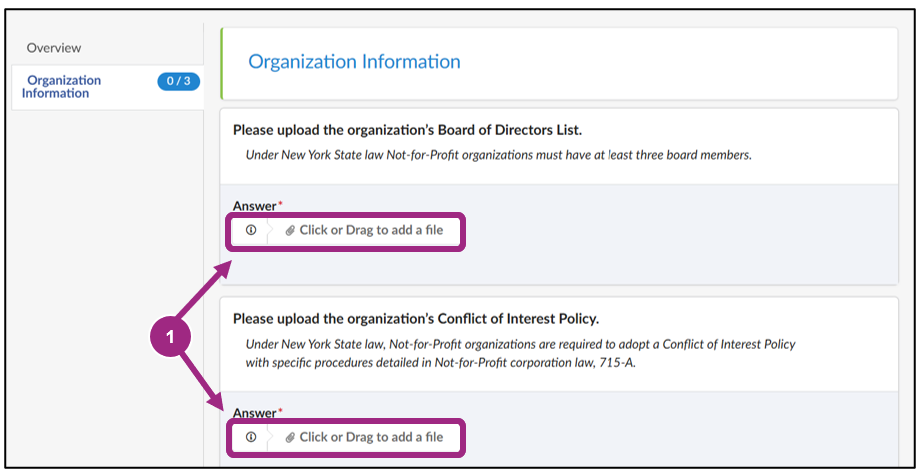
- Board of Directors List or Equivalent
- Conflict of Interest Policy and/or Board Conflict of Interest Policy. Nonprofits are required to have this policy per the Nonprofit Revitalization Act and will certify they have and will upload the document.
To upload the business documents (a, b):
-
Click the Click or Drag to add a file buttons by each business document listed, locate the file on your computer and select it.
-
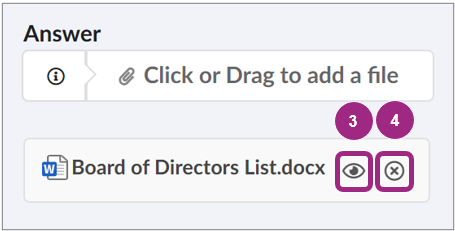
Each uploaded file will appear beneath the Click or Drag to add a file button.
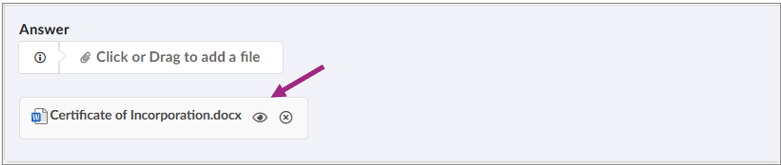
- Click the preview icon to the right of the file name to preview and verify the correct file was uploaded.
-
If the wrong file is uploaded, click the encircled X to the right of the preview icon to remove it from the PQL application. Upload the correct file.
- Read the Conflict of Interest Policy instructions.
-
If you do not have a policy, your application will not be approved.
Note: All nonprofit organizations must have an internal Conflict of Interest Policy (per New York State law).
Click the Click or Drag to add a files button to locate the policy on your local computer and select it. The document will appear below.
In the scenario above, the wrong document was uploaded and will have to be replaced with the organization's policy document as one file.
Note: This document cannot be deleted in the same way as the previous documents via the X icon which is unavailable here. In this case, the way to remove it and add a new policy document is to replace it via the Click or Drag to add a file button and select a new file to replace it.
-
Read the instructions under the Documents Tab Certification - Filings Documents - Charities Filing or Exemption Documentation. This final prompt in the Questionnaire will be to certify that your organization, as a nonprofit, has uploaded the most recent Charities Bureau Annual Filing, supporting documentation for a filing exemption, or a 30-day extension request into the Documents tab of this PQL application.
At this point, go to the Document tab to Add a Required Document. After adding the document, click the Questionnaire tab to certify you uploaded the Charities Filing or Exemption or 30-day extension request.
-
To complete the certification, click the Answer drop-down and select one of eight available options based on whether your organization is new to filing, exempt from filing, requests a 30-day extension to file a copy of the financial statement, or select the option corresponding to the organization's annual revenue and the associated Charities Bureau requirement.
Note: Your selection determines the financial document(s) to be added in the Documents tab. It's common for organizations to submit the wrong or incomplete documentation which will result in a returned application requiring revisions.
Important: To obtain a 30-day extension for either the CPA report on financial statements or the CPA Audited Financial Statements, select the appropriate option in the drop-down. You must upload a signed letter on letterhead requesting the extension along with the CHAR500 and IRS 990.
For example, if an organization is brand new to Filing with the Charities Bureau they should select I certify that the organization is new to Filing with the Charities Bureau and a CHAR500 is not yet due, and I have uploaded a copy of the filed CHAR410 in the Documents tab.

Add a Required Document
Nonprofits should first review the list of Required Documents for Nonprofit Filers. All required documents must be combined into one pdf for upload.
To add the Required Document(s) in the Documents tab, follow the steps below to upload your document from your computer or link to it from the PASSPort Vault.
- Click the Documents tab in the left navigation to view the Required Documents section. The Required Documents table displays with the Document Type, its Document Label and the Status which is currently Pending Upload.
- Click the Manage Documents button to edit the Required Document in this PQL application.
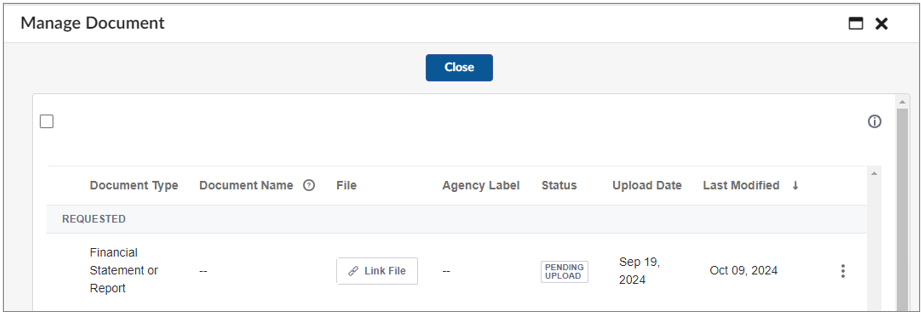
-
The Manage Document window opens. Here you will be able to link to an existing file in the Vault or upload a file from your computer to the application.
Important: You must upload all required documents in a combined PDF as certified in the questionnaire.
Important: Before proceeding, please note that the document's Validity (Start and End Dates) must meet the criteria specified in the final prompt of the Questionnaire.
- The Start Date must be the date of Discretionary PQL application submission.
- The End Date must be:
- For NYS Charities filers: Enter the deadline for the next filing year, or 30 days for an extension request.
- For Nonprofits exempt from Charities filings: Enter the date 3 years out from Discretionary PQL submission (Start Date).
Adding a required document can be done in one of two ways:
- Option 1: Upload a document from your computer (set Validity Dates upon upload) or
- Option 2: Link a document via the Vault (change / verify Validity Date via Vault prior to linking)
Option 1: Upload a Document From Your Computer
Choose this option if you need to upload the document from your computer. Follow the instructions below to attach it to your PQL application.
-
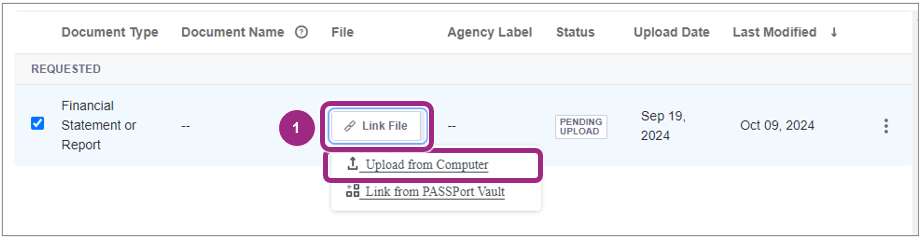
Click the Link File button, then select Upload from Computer from the drop-down menu.
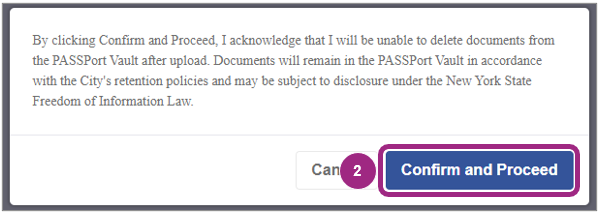
A window with a message appears. Confirm you understand that any files uploaded to the Vault cannot be deleted after upload in accordance with City record retention policies and may be subject to FOIL.
-
Read the message and click the Confirm and Proceed button to continue.
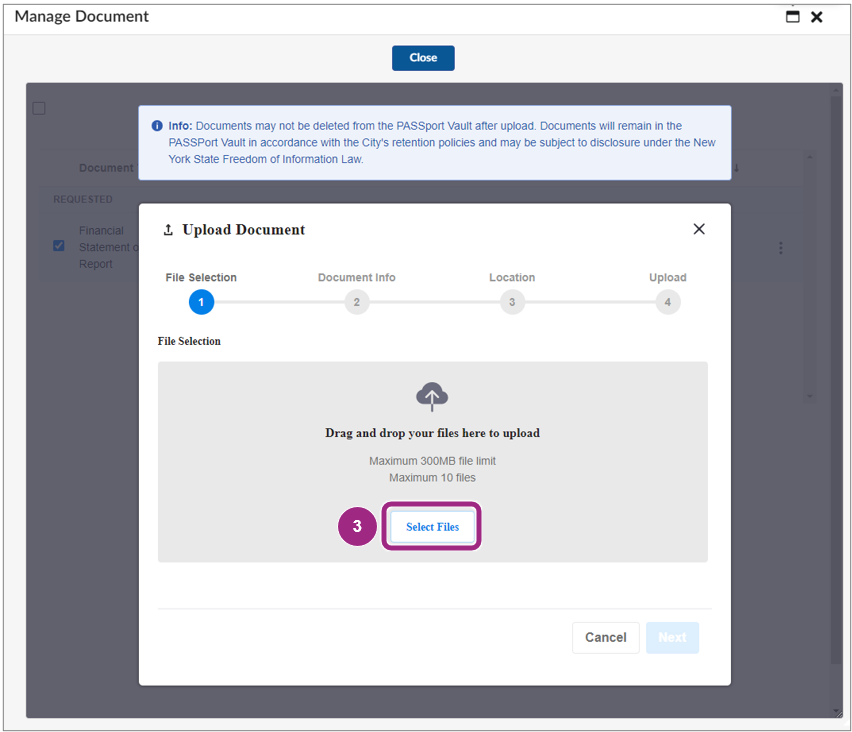
The Upload Document window displays.
-
Click the Select Files button to find and select the document on your computer.
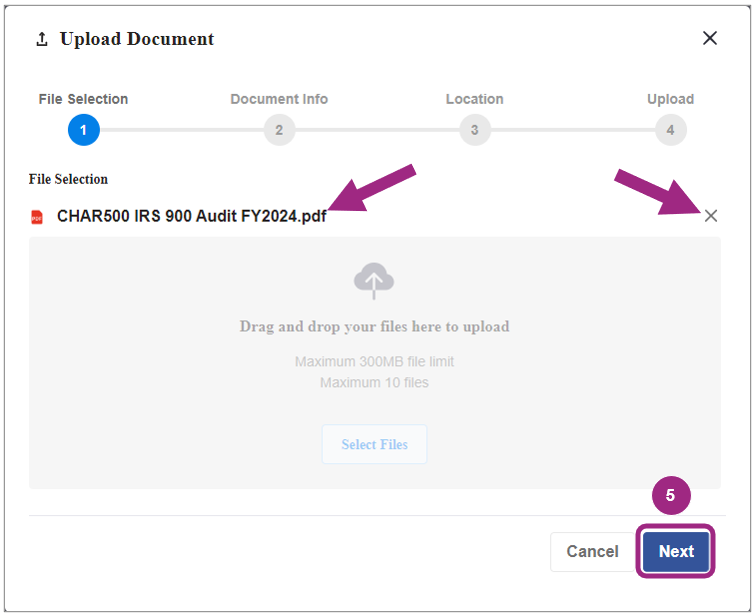
- After a file is selected from your computer, the name will display in the File Selection section. If the wrong file was selected, click the X to the right of the file listed and repeat step 3.
-
Click the Next button to continue to the next Upload Document screen, Document Info.
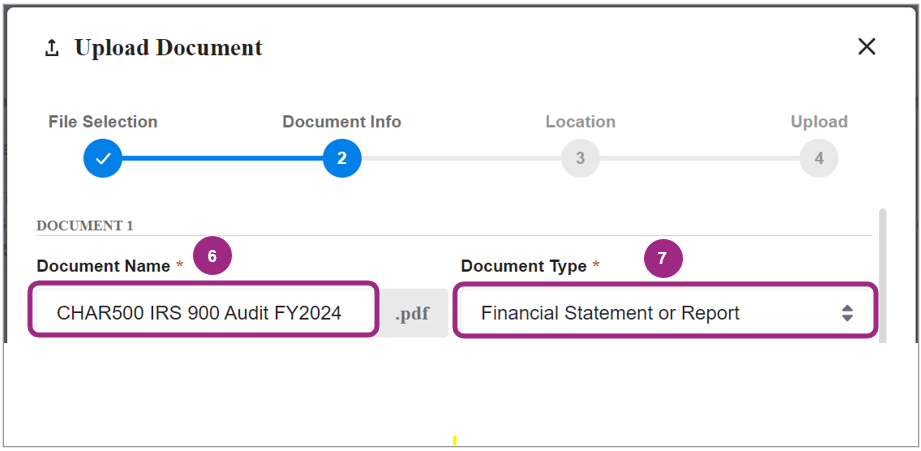
- Optional: In Document Info, edit the Document Name by typing a new name in the text field.
-
Click the Document Type drop-down and select Financial Statement or Report from the list.
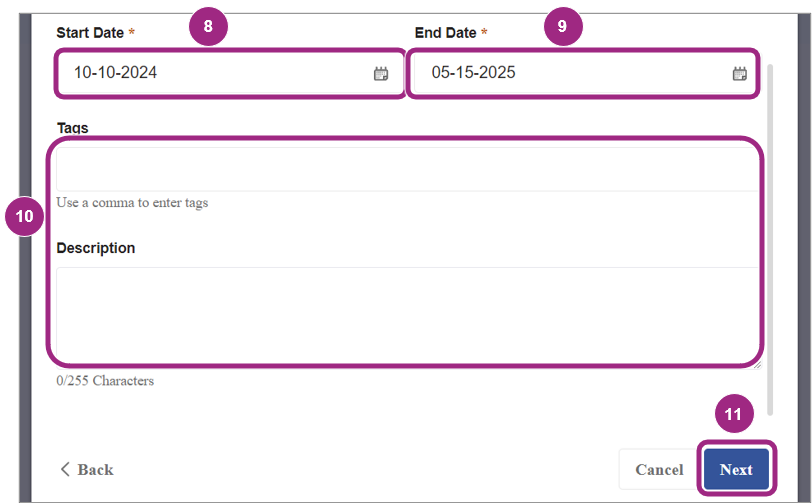
- Select the Start Date which will be the day of Discretionary PQL application submission.
-
Select the End Date.
- Nonprofits should select their next annual NYS Charities Bureau filing Due Date.
- Nonprofits exempt from submitting annual Charities Bureau filings and For Profit entities should choose the date 3 years from the application submission date.
- Nonprofit requests for 30-day extension should choose 30-days from application submission date.
- Optional: Add tags and a description to help you and your colleagues find this document in the Vault. Tip: Refer to the Upload Files to the Vault guide for more information on tags.
-
Click the Next button and proceed to the Location step.
-
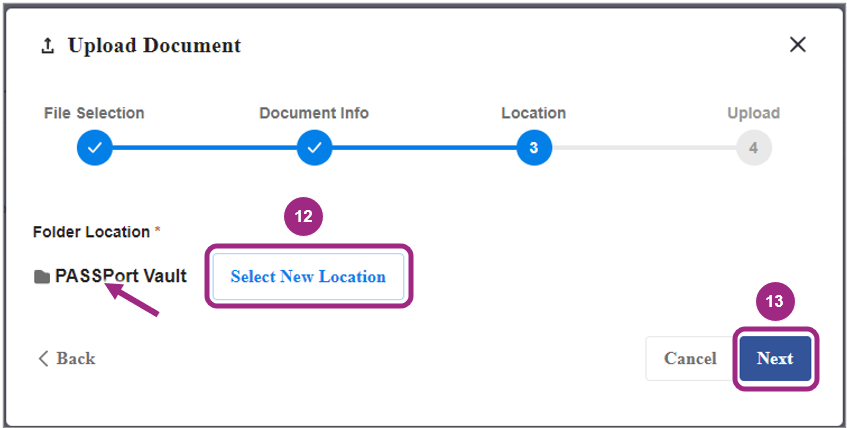
In Location, review the Folder Location which defaults to the main PASSPort Vault folder.
Optional: To change the destination folder, click the Select New Location button and choose the new location.
Tip: Refer to the Vault Best Practices guide on organizing documents and folders.
-
Click the Next button to proceed to the final Upload step.
-
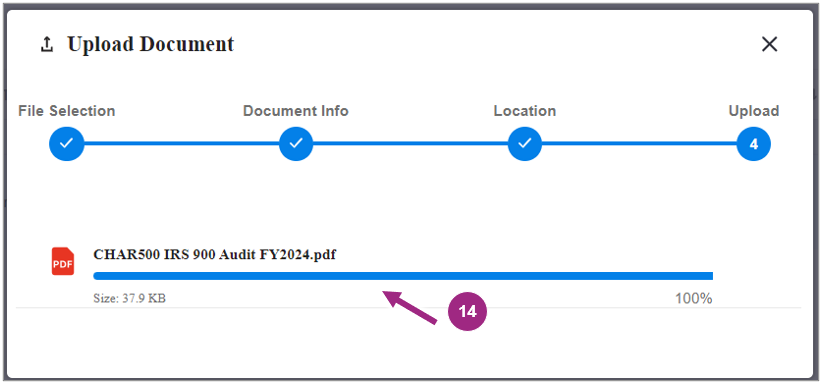
In Upload, you should see your PDF and filename with a progress meter below as it is uploading. After a successful upload, you will see the progress meter show 100%.
Tip: If your log in session times out or if the PDF doesn't upload as expected, be sure to completely log off PASSPort and close your web browser, then try again. After upload, you are returned to the Manage Documents window.
-
Review and confirm the correct file is uploaded, then click the Close button at the top of the window to return to the Documents tab.
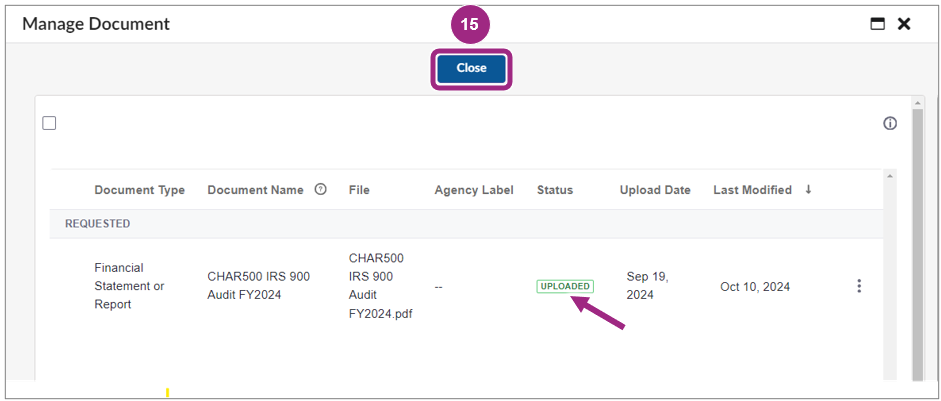
-
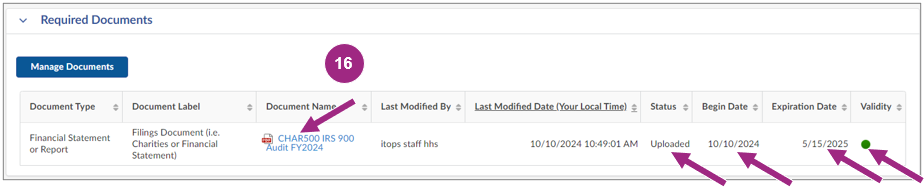
In Required Documents, confirm the Document Name shows the uploaded file with the file icon in the table.
Note: The Start and End Dates appear in the table as the Begin and Expiration Dates. When the document expires, the Validity updates from green to red.
At this point, you can complete the final prompt in the Questionnaire and then submit your Discretionary PQL application to MOCS for review.
Option 2: Link a Document Via the Vault
Choose this option when you have the latest Financial Statement or Report already in your organization's PASSPort Vault and have confirmed the Validity (Start and End Dates) meet the requirements for Discretionary PQL submission (listed above).
Important: Changes to a document's Validity must be made in the Vault before linking the document to the application. If the document in the Vault does not have the proper Validity, follow the steps in the Change the Document Start and End Dates section of this guide.
Follow the instructions below to link the required document to your PQL Application.
-
Click the Link File button, then select Link from PASSPort Vault from the drop-down menu.
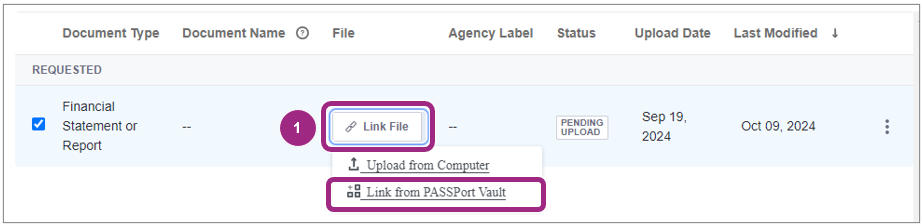
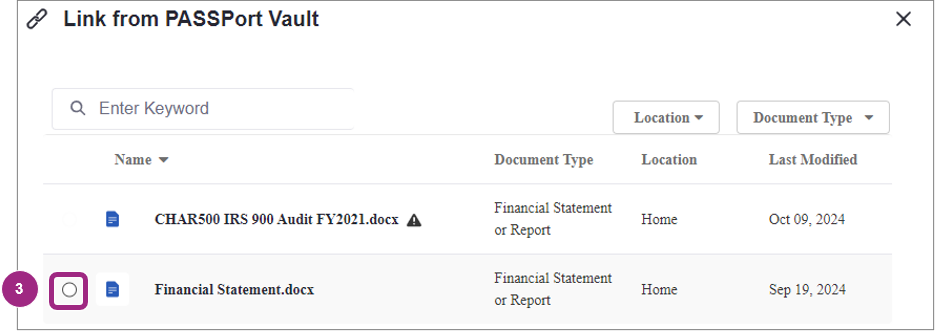
The Link from PASSPort Vault window appears.
-
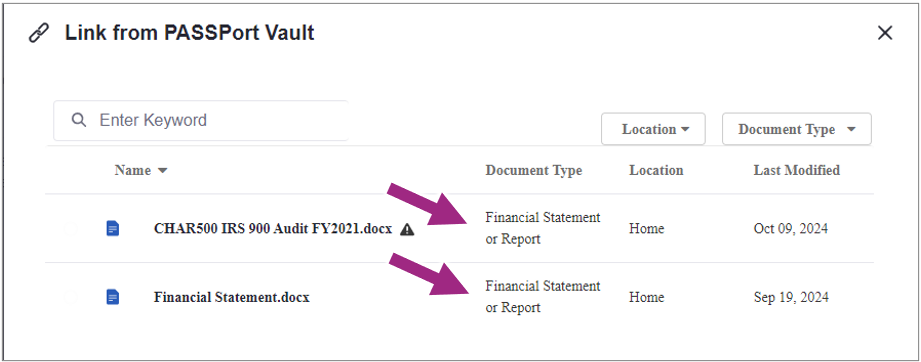
The documents available for linking from the PASSPort Vault will only include documents classified by the document type Financial Statement or Report. The image below shows there are only 2 documents in the Vault with this document type.
-
Move your mouse over the document you want to link. A radio button will appear to the left of the document's icon and Name. Click the radio button to select the document.
Tip: The radio button displays only when the mouse moves over the area to the left of the file icon. Once it becomes visible it can be clicked.
-
Click the Select button located to the bottom right of the same window.
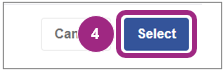
The page refreshes and returns to the main Manage Document window.
-
Review and verify the Document Name, File (displaying file name and extension) and new Status (now Uploaded).

At this point, you can complete the final prompt in the Questionnaire and then submit your Discretionary PQL application to MOCS for review.
Change the Document Start and End Dates
If you already uploaded the required document to your PASSPort Vault, but the Validity dates are not correct, before linking you must change the Start and End Dates (also referred to as Validity) of the Financial Statement or Report.
Follow the steps below to change the dates:
- Go to the PASSPort Vault. For guidance, see the Access the PASSPort Vault guide.
- Find the document in your organization's Vault. Need help finding that document? See the Search the Vault guide.
-
Click the ellipsis (3 vertical dots) on the right to view the drop-down menu, then select View Details.
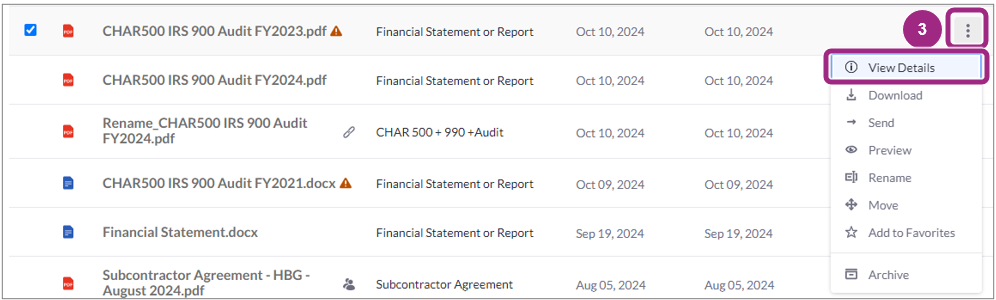
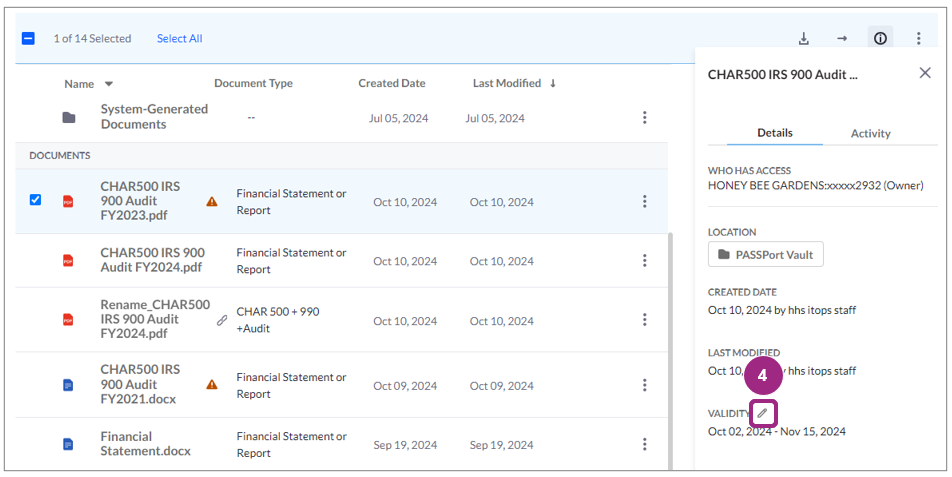
The Details panel appears on the right of the screen.
-
The Details tab displays as default. Locate the Validity and click the pencil icon next to it.
View the annual filing schedule to determine the correct Start and End Dates to enter in the Validity.
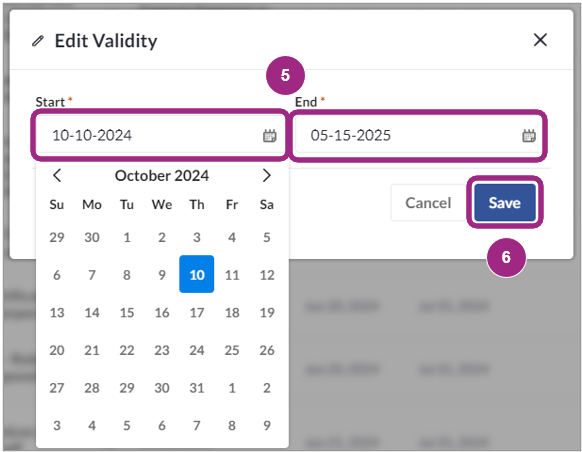
The Edit Validity window opens.
-
Change the Validity dates by clicking the Start and End date fields.
-
Click the Save button and return to the folder in the Vault where the document is located.
- Repeat step 3 to view and confirm the Validity dates have changed.
- At this point, you can link the document back to the PQL application by following the instructions to Link a Document Via the Vault earlier in this guide.
Avoid Common Mistakes in the Discretionary PQL Application
Review the guidance below to avoid common mistakes many vendors make and work towards getting your organization's prequalification approved from the initial submission.
Questionnaire Mistakes
- Incomplete Certificate of Incorporation (COI) or Equivalent
- Be sure to provide a copy of the complete document issued by New York State (or state it was incorporated in) including amendments addressing name change, foreign entity registration (also known as the Application of Authority with NYS), Articles of Organization (LLCs only), etc.
- Name on Required Document such as Certificate of Incorporation or equivalent must match Legal Name in PASSPort.
- Incomplete and Outdated Board of Directors List
- Be sure to provide the most current version including board members' current place of employment (if applicable).
- Important: To be in compliance with NYS law and NYC contracts, the board chair, board secretary, and board treasurer cannot be employed by the organization.
- Policies Adopted by a Different Organization
- Be sure to provide the organization's internal Conflict of Interest Policy, as adopted by the board of directors.
Required Documents Mistakes
- Incorrect Start and/or End Date of Financial Statement or Report.
- Be sure to enter the date of Discretionary PQL Application submission as the Start Date.
- Nonprofits (annual filers) must determine the End Date by checking the Charities Bureau Filing Schedule for the deadline of their next filing year.
-
Nonprofits (exempt) and for profits must enter the date 3 years from submission as the End Date.
Note: The End Date determines the expiration of Discretionary PQL Application.
- Dates do not align or are incorrect within the Charities Filing (CHAR500, 990, and Audit).
- Be sure all combined documents are for the same filing period.
- Be sure to submit a complete copy of the documents submitted to the Charities Bureau.
- Date missing next to signature in Charities Filing (CHAR500).
- Be sure to submit a complete copy of the documents submitted to the Charities Bureau.
Submit the Discretionary PQL Application to MOCS for Review
After completing the Questionnaire and the Documents tabs, submit the Discretionary PQL Application to your colleagues (with a Vendor Procurement L2 or Vendor Admin role) who will then submit it to MOCS for review.
Note: Not all organizations will require 2 individuals (levels) to complete and submit their Discretionary PQL Application. It's common for organizations to have a user with only the Vendor Procurement L2 or Vendor Admin role complete and submit the application to MOCS without the assistance of a colleague with the Vendor Procurement L1 role.
-
In the Discretionary PQL Application, click the Submit for Review button.

-
Click the Sign and Submit Application button to proceed to the Electronic Signature.
Important: To make any changes to the PQL application before signing and submitting, click the Return to Vendor L1 Draft button.
Note: Only users with a Vendor Procurement L2 or Vendor Admin role may complete this and subsequent steps.

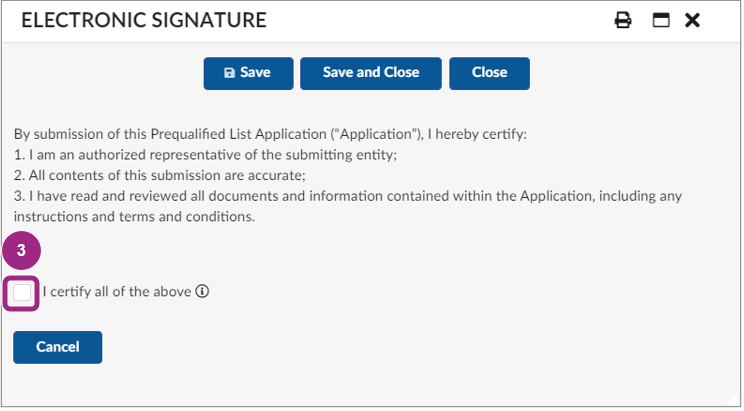
-
Read the statement and click the I Certify All of the Above checkbox.
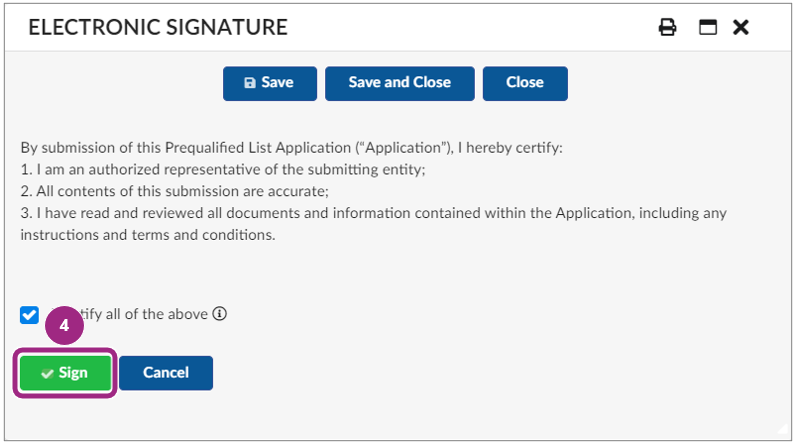
The window refreshes and the Sign button appears to the left of the Cancel button.
-
Click the green Sign button.
-
The Discretionary PQL application is now In Review with MOCS. Note the message above the PQL Information section in the Overview tab:
This application is currently In Review. To make any changes, please contact the Managing Agency to return this application.
In the case of the Discretionary PQL, the managing Agency is MOCS.
-
In the Vendor Status section, the Application Activity updates to In Review. You will be notified by email when a decision is made, or if the application is returned for revisions, you will receive a list of questions that need to be addressed.
If your organization's Discretionary PQL Application is Approved by MOCS, the Current Status will reflect Approved.
Appendix
Required Documents for Nonprofit Filers

- Nonprofits that filed with the Charities Bureau within the last 12 months must upload their Char410
- Nonprofits with a revenue of $25K or less must upload their Char500
- Nonprofits with a revenue over $25K to $250K must upload their Char500 and IRS 990 Form
- Nonprofits with a revenue over $250K to $1Mk must upload their Char500, IRS 990 Form, and CPA Reviewed Report
- Nonprofits with a revenue over $1Mk must upload their Char500, IRS 990 Form, and CPA Audited Financial Statements
- Nonprofits that are exempt from filing with the Charities Bureau must upload their 12 Month Financial Statement and Exemption or Request Letter on letterhead
- Nonprofits that requested a 30 day extension to file must upload their Char500, IRS 990 Form, and Exemption or Request Letter on letterhead
Validity End Dates for Annual Filers and Other Organizations

- For 7A or DUAL registrants, if your filing period is
- between February 1 - January 31, your validity end date is December 15 of the same year.
- between March 1 - February 28, your validity end date is January 15 of the following year.
- between April 1 - March 31, your validity end date is February 15 of the following year.
- between May 1 - April 30, your validity end date is March 15 of the following year.
- between June 1 - May 31, your validity end date is April 15 of the following year.
- between July 1 - June 30, your validity end date is May 15 of the following year.
- between August 1 - July 31, your validity end date is June 15 of the following year.
- between September 1 - August 31, your validity end date is July 15 of the following year.
- between October 1 - September 30, your validity end date is August 15 of the following year.
- between November 1 - October 31, your validity end date is September 15 of the following year.
- between December 1 - November 30, your validity end date is October 15 of the following year.
- between January 1 - December 31, your validity end date is November 15 of the following year.
- For EPTL Registrants, if your filing period is
- between February 1 - January 31, your validity end date is January 31 of the following year.
- between March 1 - February 28, your validity end date is February 28 of the following year.
- between April 1 - March 31, your validity end date is March 31 of the following year.
- between May 1 - April 30, your validity end date is April 30 of the following year.
- between June 1 - May 31, your validity end date is May 31 of the following year.
- between July 1 - June 30, your validity end date is June 30 of the following year.
- between August 1 - July 31, your validity end date is July 31 of the following year.
- between September 1 - August 31, your validity end date is August 31 of the following year.
- between October 1 - September 30, your validity end date is September 30 of the following year.
- between November 1 - October 31, your validity end date is October 31 of the following year.
- between December 1 - November 30, your validity end date is November 30 of the following year.
- between January 1 - December 31, your validity end date is December 31 of the following year.
- For Exempt Nonporfits and For Profits, your validity end date is 3 years from the PQL application submission date.
Filing Nonprofits: Take note whether your organization is a 7A or Dual vs. EPTL registrant. Deadlines vary based on this category. The Validity End Date is the next year's filing deadline.
Example: Filing period = July 1, 2023 - June 30, 2024. With this filing period:
A 7A or Dual registrant's deadline is May 15, 2025. The next filing year's deadline is May 15, 2026.
An EPTL registrant's deadline is June 30, 2025. The next filing year's deadline is June 30, 2026.
Certificate of Incorporation: List of Equivalents and other Required Documents
All necessary Certificate of Incorporation (COI) or equivalent documents must be submitted as a combined PDF

- For Profit or Nonprofit Corporations must upload their Certificate of Incorporation or Formation
- Limited Liability Companies must upload their Articles of Organization
- Foreign Organizations Formed Outside New York State must upload their Certificate of Incorporation or Formation as well as their Application of Authority (issued by NYS)
- Sole Proprietorships must upload a County Clerk Certificate
- Educational Institutions Chartered under the NYS Dept of Education, such as libraries, museums, etc., must upload either a Provisional Charter or an Absolute Charter
- Private foundations must upload their Articles of Association
- All organizations seeking to change their legal business name must upload the Certificate of Amendment
- All organizations seeking to do business under a name that is not their legal business name must upload the Certificate of Assumed Name (DBA).
Last updated: May 2, 2025